Showing posts with label food. Show all posts

Honey Basil Collins

Ok, so, I'm definitely cheating a little bit here because I didn't actually come up with this cocktail, but this collins from Oven & Shaker was the first drink I wanted to try my hand at when I got home. I figured I'd share the recipe here since not everyone has the privilege of living (+ eating + drinking) in Portland! If you're in Portland, I would highly recommend giving Oven & Shaker a try (get the spicy salami pizza - you'll never have pizza without honey again!).

For this drink you will need a small handful of fresh basil, 2 oz. vodka (I've also found this drink is pretty good with gin), 3/4 oz. lemon juice, a squirt or two of honey (I would adjust this based on your preferences), 2 oz. seltzer water, and ice.
What I do is tear the basil up roughly (not too small) and throw it in my cup with the vodka and honey. Muddle to release the flavor of the basil. Add the remaining ingredients, mix well, and fill your glass with ice. Enjoy your perfect summer drink!

Do you have any favorite summer drinks? I would love to hear! xo

Happy Hour // 6 Cocktail Recipes to Try This Summer!

Today is my last day in Portland before I head to New Hampshire for the summer...The past week has been full of packing/cleaning, visits with friends, and trips to all of my favorite restaurants and bars. I'm gonna miss this little foodie city! Time for me to drink away my sorrows, right? ;) Summer is the season of cocktails in my book, so I'm excited to spend the summer coming up with some new boozy concoctions. Have you tried any of the drinks I made last summer? Here are a few cocktails I can't wait to try! (Most of these would also be pretty easy to make virgin as well).

Healthy Eats // Weeknight Dinners

On weeknights sometimes all I want to do when I get home is lounge around and eat a box of mac and cheese. I love cooking beautiful, extravagant meals but during the week it's just not going to happen. To help myself eat healthy during the week I've started to collect some easy, balanced meals that I can throw together quickly. Here are a few that I can't wait to try!
1: Green Chickpea & Chicken Curry with Swiss Chard // 2: Cheesy Quinoa Bowl // 3: Chermoula Eggplant with Bulgur and Yogurt // 4: Baby Bok Choy and Shiitake Stir-Fry // 5: Rosemary Lemon Pasta // 6: Summer Rolls with Peanut Sauce // 7: Vegetable Chili with Polenta

What are your go-to weeknight meals?

If You Didn't Like Radishes Before, You Will Like Them Now.

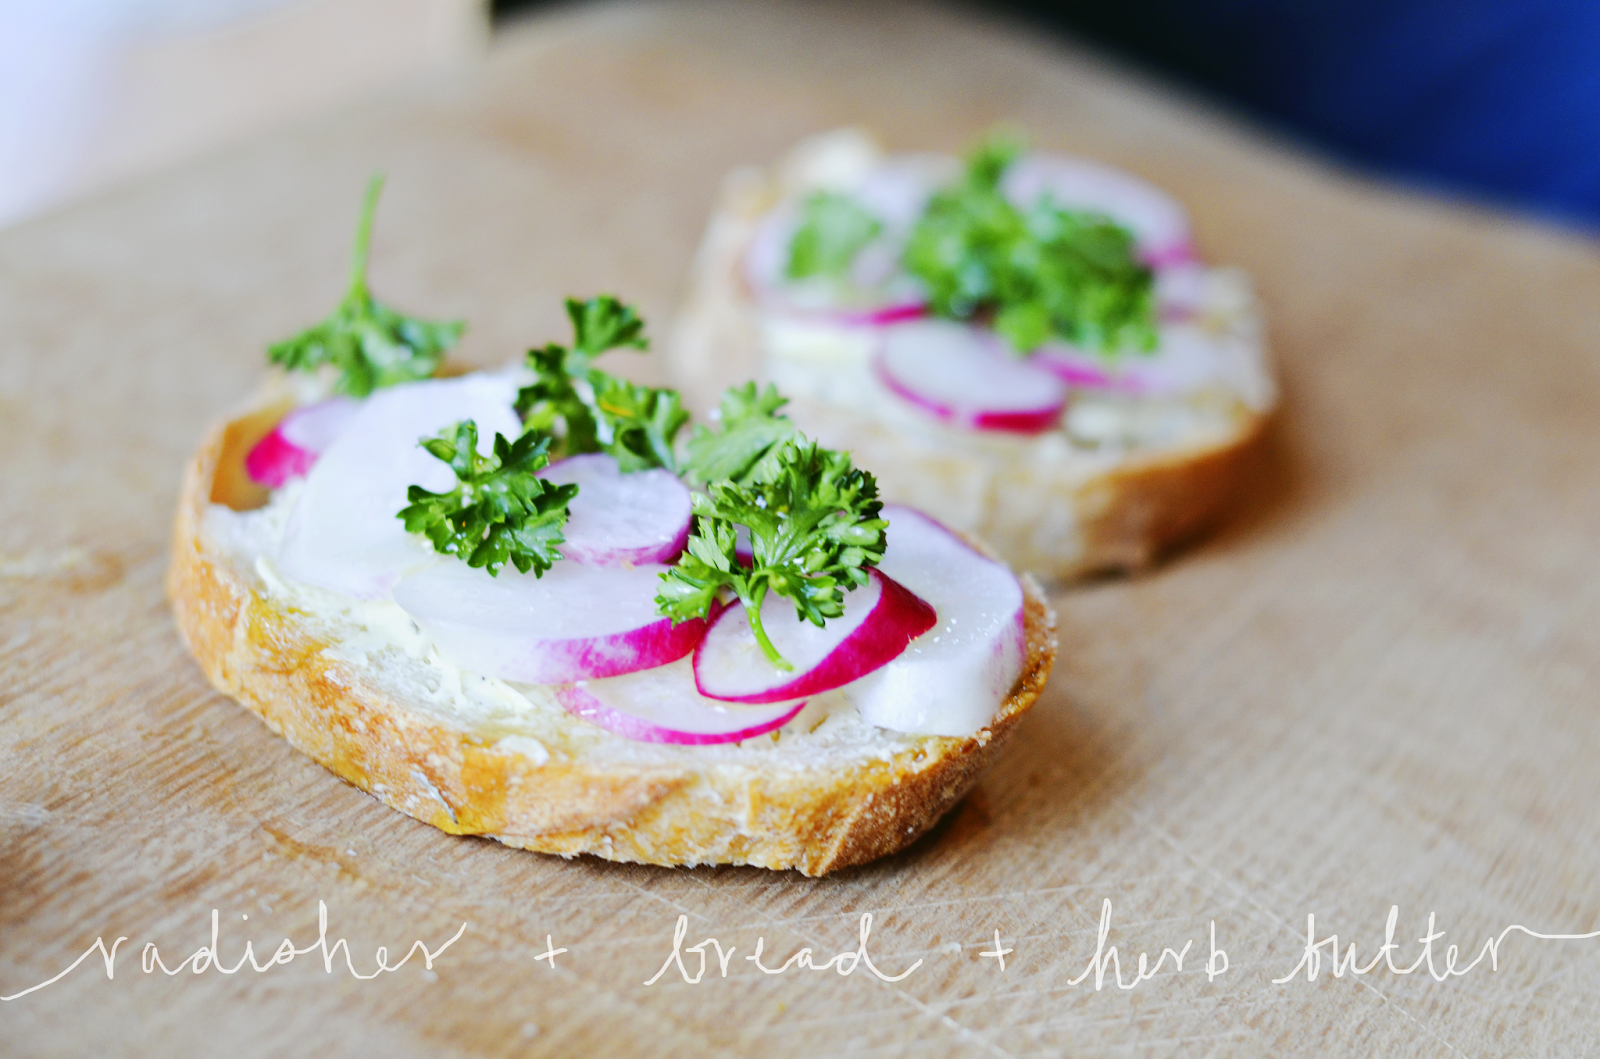
When my dad was visiting a couple of weeks ago we went to a restaurant called Sauvage in SE Portland and I ordered this appetizer. My dad and Taylor were skeptical - radishes, herb butter, parsley? Sounds boring - but I went ahead and got it because I've recently developed a small obsession with radishes. And guess what? This super simple dish ended up being one of the best of the night. So of course, the following weekend I went to the farmers market, got some radishes and whipped up the dish myself. This is so good guys! If you don't like radishes, you should still give this little snack a try. Butter and salt make everything better.
Here's what you will need to do...

Start by making your herb butter. I took the easy route and whipped some butter in a bowl with dried herbs, but you can use fresh herbs if you're fancy/motivated like that. I sprinkled in dried thyme, sage, and rosemary until I felt like the butter to herb ratio seemed right.
Now, slice up the radishes and cut some pieces of bread (extra points if it's fresh). Spread a thick layer of herb butter on each piece of bread (seriously, get crazy), and pile on some radishes. Now drizzle a little bit of olive oil over each piece, sprinkle with course sea salt, and garnish with some parsley. That's it! Best snack ever.
Hope you all had a great weekend!

Healthy Eats // Guilty Pleasures


Well, it’s only the second round of these “healthy eats” posts and I’m already on to guilty pleasure foods…really, Ella? Oh well, baby steps, right? This week I thought I’d find some healthier alternatives to some guilty pleasure foods (though, if we’re being completely honest I’m not sure that sweet potato fries are any better for you than regular fries. But they just look so good!). This way on those days when you really just want pizza or mac and cheese, you have an option that won’t completely ruin all the healthy eating you did before ;) 

Here are some alternatives to pizza, fries, potato chips, burgers, frozen yogurt, and mac and cheese that I've come across recently. I'm most excited about trying the cauliflower crust pizza. I really hope it tastes as good as it looks.

Healthy Eats // Salads

Lately I've been trying my best to eat healthy, but last week after I realized that I had eaten pizza for dinner two days in a row, and that the box of Girl Scout cookies I had just bought was completely empty, I realized I need to be even more conscious and intentional about what I'm putting in my body. I can definitely feel a difference in my energy level when I'm eating well. And let me tell you, my job requires a lot of energy.

I find that I get stuck in a rut easily when it comes to cooking...It's pretty frustrating cooking for one (occasionally two if Taylor comes over) while trying to save money. I often find myself wasting food because I can't finish it before it goes off, so I have a couple go-to meals for one that I find myself making over and over again. And this means my diet isn't particularly balanced (let's not talk about how much pasta I end up eating). I want to start trying out some new recipes and building my repertoire of meals that work for my particular situation. Hopefully this will help me be better at meal planning as well so I can save some money! First up, some interesting salads to get those greens in.

What are your go to meals? Do you have any strategies for making sure you're eating well? I'd love to hear!

Follow my Food + Drink Pinterest Board for more healthy (and not so healthy) food inspiration!

A Cocktail Shaker for All You Mason Jar Lovers

The number of jars floating around our house is a little ridiculous. We have them in every size, design and shape. And of course we had to buy the blue ones when they started making them again. Our one male housemate doesn't get the obsession at all and I think he secretly tries to sneak a few of them into the recycling bin every so often...hah! We use them as cups, vases, pen holders, make up organizers, traveling mugs...you name it. A while back I saw these mason jar cocktail shakers and thought, I could make that! Taylor's birthday gifts this year were mostly alcohol themed - he's recently gotten into whiskey, so I got him some whisky and fancy drink making ingredients. I decided to make him a shaker to go along with it. Here's how I did it...
To do this you will need a 32 oz mason jar and one extra lid (just the flat part, not the collar). You can find packages of just these at most stores that sell mason jars. One lid will be for shaking and the other will be for pouring. I decided to cover the shaking lid with some chalkboard tape I had on hand, so we can write fun little messages on it. If you can find some food safe paint that will stick to metal, it could be fun to paint the lids as well. Get creative!
To make the pouring lid you will need a nail, a hammer (or a drill), and super coarse sandpaper (or a metal file would probably work better). Poke one hole at the top, and a bunch of holes on the bottom (see picture). The underside of the lid will be a bit dangerous at this point...I pounded the spikes down with a hammer and sanded it a bit to prevent any cocktail making injuries (it's serious business, guys). That's it! Now go make some drinks. And, uh, remember to drink responsibly, kids ;)

Easy-Peasy Icebox Cake

Every year for Taylor's birthday his mom makes him an icebox cake. Ever heard of it? It's insanely good and tastes like cookies and cream (but Taylor would tell you it tastes like his birthday). When Taylor left home to go to school on the other side of the country, I started making the cake for him each year. His birthday was on Wednesday, so I made it this week and thought I'd share with you all! Luckily, this is the easiest cake to make. Ready to hear what the ingredients are? Ok, go: whipping cream, vanilla extract, sugar and 2 boxes of Nabisco chocolate wafer cookies. That's it!
To make it, whip up a big ol' bowl of whipped cream using about 3 cups of whipping cream. Now, lay down a layer of cookies, cover them in whipped cream, and then lay down another layer of cookies...keep layering the cookies and whipped cream until everything's gone. Don't worry about making a big mess of it...you can make it look pretty at the end! When you're done, stick it in the fridge over night. This is essential because you want the cookies to get soft! Now, try not to devour the whole thing in one sitting :)
I'll be back this weekend with a little DIY present I made for Taylor that I'm pretty excited about!

Flavored Popcorn: Three Ways

Since the Academy Awards are tomorrow I thought it would be an appropriate time to come up with some fun flavored popcorn recipes! These would make a great little snack for a viewing party if you're planning to watch with friends. And if you want to get a little fancy, I've included an easy tutorial to make little popcorn bags to serve it in!

Each of these flavors are pretty simple and easy to make. I went three different directions: One sweet, one salty, and one with a little spice. Each of the recipes for these toppings are enough to flavor about a third cup of popcorn (makes a medium sized bowl). I made the popcorn first by heating up a couple of tablespoons of coconut oil on medium heat (using coconut oil gives the popcorn a slight flavor and makes the house smell amazing). I put in one kernel first and waited until it popped so I knew when the oil was ready. Pour in your kernels, cover the pot, and shake it around over the heat until it stops popping.
Honey Butter Popcorn: Melt 3 tablespoons of butter and 2 tablespoons of honey in the microwave, and stir. Pour the honey butter mixture over the popcorn as you stir it. Season with some salt and you're done!

Asian Inspired Popcorn: Start by covering your popcorn with a thin layer of melted butter (about a tablespoon).  Now, put a bit of soy sauce in a spray bottle (weird, I know, but it's the best way to do this without making the popcorn soggy), and spray the popcorn with a thin layer of soy sauce. Sprinkle on a teaspoon of wasabi powder, a couple sheets of crumbled nori (we used teriyaki flavored), and salt. If you don't have a little spray bottle on hand you could forgo the soy sauce, add a little more melted butter so everything sticks and finish with a sprinkling of nutritional yeast.

Curried Popcorn: Cover your popcorn in 2-3 tablespoons of melted butter. Sprinkle on 1-2 teaspoons of curry powder and sprinkle with nutritional yeast and salt to taste. That's it!
Aaaand here's how to make those cute little popcorn bags. I used pages out of a magazine because they are the right thickness for these bags, but you could also use regular paper. Start with a full sheet of paper and fold one side about 2/3 of the way, then fold it back on itself, and then back over again (like when you're making a fan...take a look at the pictures below and it will all make sense!). Do the same to the other side. Use tape or glue to attach the two sides. Now, choose which end will be your bottom and double fold and tape/glue it down. Cut off any excess paper at the top and cut a zig zag shape along the top of the bag. Now fill it up with yummy popcorn!
Will you be watching the Academy Awards tomorrow? I think our plan is to watch the show with a few friends during our weekly family dinner. I've always loved watching them so I can't wait! What's your favorite part of the Academy Awards? The dresses? Betting on who will win?

P. S.Thanks to my roommate Sydney for reteaching me how to properly pop popcorn and helping me come up with the flavors! :)

Citrus Kale Salad

I love kale, but I really haven't been able to get with the whole raw kale salad craze. I will eat steamed kale or baked kale chips all day and night, but raw kale is just too chewy for me! I decided to do a little research to see if I could come up with something I liked...I came up with this simple salad recipe, and it turned out so well I just had to share. The citrus breaks down the kale a bit, so it's not as tough, and the feta adds a little creaminess. Yum!
Here's what you will need:
-Around half a bag/bunch of kale
-1 Grapefruit
-1 Lemon
-3 tablespoons olive oil
-Salt & Pepper
-Sliced almonds
-Feta Cheese

Start by tearing up your kale. Get rid of any thicker stalks. Put your kale in a large bowl and squeeze the juice of one lemon over the kale (watch out for seeds!). Next, add your olive oil. Cut open the grapefruit and use a spoon to take out the meat and add it to the salad (do it over the salad so all the juice goes in). Once you've removed all of the meat, squeeze the rest of the grapefruit juice over the kale. Season the salad to taste with a bit of salt and pepper and mix well. Let the salad sit for a bit. The longer you let it sit, the softer the kale will get. When you're ready to serve the salad, sprinkle on some almond slices and feta. Enjoy!
Do you have any favorite kale recipes? Please do share!

Heavenly Pretzels & Spicy Cheese Sauce

I have something to tell you, but you guys have to promise not to judge me or tell anyone else. My number one guilty pleasure food is soft pretzels and spicy nacho cheese. Especially that nasty fake cheese. Mmmm. So, when I saw this recipe I pinned it immediately. This weekend Taylor and I decided we wanted to bake something, and I managed to convince him that we should make pretzels and cheese sauce (he thinks I’m gross). These turned out SO yummy. Go make them. Right now. You won’t regret it.
For the pretzels we just followed this recipe from Half Baked Harvest. The recipe is perfection, so no need to make any alterations. These pretzels are perfect for making on a lazy Sunday at home. We spent about half the day making the pretzels, working on projects in between the steps.
We changed around the cheese sauce a little based on what we had on hand. Here’s what we did: Make a roux like they say in the recipe above, then add the milk (my roux didn’t really do the job and the milk wasn’t thickening, so I added a little corn starch). Next add in 3 oz cream cheese and around a cup of sharp cheddar cheese. Once the cheese is melted add some chopped up pickled jalapeños. I think we used around 15-20 of the little slices. Next, add in a few tablespoons of the juice from the jalapeños. I’m pretty sure that this was the ingredient that made the sauce. Lastly, add in some cayenne pepper a little sprinkle at a time, testing until it’s spicy enough for your taste. Now, dunk your warm pretzels in there and devour them all in one sitting. I won't tell if you don't.

Thai Noodle Soup

This is a recipe my family learned from our friend Yai, who is from Thailand. He is an amazing cook and always gives us cooking lessons when we visit him. He taught us how to make Thai noodle soup years ago and it has been one of our favorite recipes ever since. If you've every had Pho before, this is very similar to that. His recipes never have any measurements or anything, so hopefully I remembered everything correctly...regardless, it tasted preeeetty yummy to me!
This meal really should be pretty simple to make, but there are a lot of little things that you will need to be throwing together at once, so it definitely helps to plan out how you are going to do things before you start cooking. This meal makes about 4 large servings.

First, start your broth.

You will need:
8 cups of high quality chicken broth (not a stock - there should be as few ingredients in it as possible. Obviously it is preferable to make your own broth from scratch if you can! If you are vegetarian you can also use veggie broth instead.)
2 whole garlic cloves
3 stalks of lemon grass, chopped roughly
2-3 kaffir lime leaves
10 peppercorns
A bit of star anise

Pour your plain chicken broth into a large pot and bring to a boil (while you are waiting for this to happen you can prepare your noodles - see below). Add in your garlic, lemon grass, kaffir lime leaves, peppercorns, star anise and chilies. Cover and let simmer while you finish everything else. If you would like to have chicken in your soup rather than tofu you should also add your chicken to the broth (obviously in this case it will mean keeping more of an eye on the broth so your chicken cooks the right amount). Right before you are ready to serve the dish, add in a couple bunches of bok choy (or any other similar green) and cook for a couple of minutes.

While you are waiting for your broth to come to a boil, cook your noodles. 

You will need about 2/3 of a packet of flat rice noodles. Put the noodles in a large bowl and pour boiling water over them until they are completely immersed. Let them soak until they are al dente (should be about 5-10 minutes). Immediately strain them and run cold water over them so they don't stick together. Set them aside!

Now, we need to prepare all of your toppings! You can always add or subtract from this list, up to you! Set all of these aside in little bowls so everyone can add what they'd like to their soup!

1) Fried tofu: Take one packet of extra firm tofu and try to get as much of the water out of it as you can. Cut the whole thing up into cubes and toss them in flour until each piece is coated. Season with salt and pepper. Fry the pieces in a pan with olive oil until they are brown and crispy (this method of cooking tofu has turned many tofu skeptics around!...but if tofu still scares you, use the chicken you put in your broth as your protein).

2) Fried lemongrass. Chop 4 stalks of lemongrass up finely. Fry in a pan with a bit of oil at medium heat until they are brown and crispy. Put them on a paper towel to soak up any excess oil before transferring them to a small bowl.

3) Fried green onion (or shallots). Chop 4 pieces of green onion up finely. Fry in a pan with a bit of oil at medium heat until they are brown and crispy. Put them on a paper towel to soak up any excess oil.

4) Fried garlic. Chop 3 cloves of garlic up finely. Fry in a pan with a bit of oil at medium/low heat until they are brown and crispy. Put them on a paper towel to soak up any excess oil.

5) Nuoc mam sauce. Mix together 3 tablespoons lime juice, 2 tablespoons sugar, 1/2 cup water, and 2 1/2 tablespoons fish sauce. Add some finely chopped garlic and thai red chili when you are done making any adjustments!

The rest don't involve much preparation, just set them out for people to add!

6) Finely chopped cilantro
7) Bean sprouts
8) Tom yum sauce (this sauce is the best, you can find it at your local Asian market)
9) Sriracha
10) Soy sauce
11) Lime juice
12) Finely chopped peanuts
13) Thai basil
...Anything else you think might be good!

Now, what my family generally does is let everyone add what they want to their soup. Serve up bowls of broth, bok choy and noodles and each person can add the rest. I usually add a bit of almost everything, give it a try and then adjust as needed. My favorite is the tom yum sauce so I always use lots of that :)

Let me know if you have any questions!

Guest Post: White Rose Hot Tea Cocktail

Hey friends! I'm over on Life Laid Bear today sharing my recipe for a hot tea cocktail!...I know, sounds pretty weird. But it's delicious, I promise! Head on over to Jessica's blog to see the full post!
In other news, I apologize if posts over the next week are a little sparse. I started my new job today (yay!) and am adjusting to the new schedule and trying to figure out how to fit in all the other responsibilities I committed to while I was unemployed (ugh). Then this weekend Taylor and I are heading up to Seattle to see my mom (she will be there for a wedding) and do some exploring...So you might see some pictures from that trip around here in the near future!

Jasmine Lavender Lemon Drop

Ok, time for another cocktail recipe! You didn't think I would go more than a couple weeks without posting one, did you? This is another one using the infused alcohols Caroline and I made a while back. This one is probably our favorite...and it's super simple.

You will need:
1/2 shot jasmine infused vodka + 1/2 to 1 shot regular vodka (we only mixed the infused vodka with regular vodka because we left the jasmine in for too long and it got really strong).
Juice of 1 lemon
2/3 shot lavender syrup (heat equal parts sugar and water and some fresh lavender until sugar is completely dissolved)
Fine lavender infused sugar for the rim (if you're planning ahead, put a few spoonfuls of fresh lavender in a container with some sugar for a few days...but if you're doing it last minute like us, just smash the lavender into the sugar)

Mix everything together and shake with ice in a shaker (a mason jar will do). Rim your glass with sugar, pour your yummy drink in and serve!

For your viewing pleasure, here is a photo I took of Caroline's kitten Willow making herself at home in my purse while we made drinks. Such a silly kitty.
In other news, I got offered a job today! I think I'm gonna take it. Consistent income...wooo! No more interviews and scary networking...double woo! Who else gets way too anxious about meeting new people? Getting a job is stressful!

Tay's Sidecar Recipe

Hi Friends! I have another cocktail recipe for you!...Surprised? I promise I do things other than make/drink cocktails...Really! Today Taylor is here to share his version of a sidecar - I'm not much of a whiskey fan, so I think that the fact that I can stand to take more than a sip or two of this drink says a lot! Here are Taylor's directions:
"You will need:
Bourbon
Lime Juice
Sugar
Triple Sec
Angostura Bitters
Maple Syrup
Tonic Water

Pour half an ounce of lime juice into a mason jar. Sprinkle in a pinch of sugar, close the lid and shake until it dissolves (or just use pre-made sweetened lime juice). Next, add 3/4 oz of Triple Sec, 1 oz of bourbon, 3 dashes of Angostura Bitters, and 1/4 oz of pure maple syrup (preferably not Aunt Jemima's, though that may be my New England Snobbery talking). Close the lid on the mason jar and shake until the drink begins to foam. Pour over ice and dilute with tonic water."

That's it! Hope you all can enjoy this drink before Summer leaves us for good. Before you know it will be time for hot cocoa and hot cider. I've been doing DIYs like crazy over here (along with endless job applications...ugh) and I'm so excited to share them all with you as soon as they're done! I have a project for you tomorrow that will take you about five minutes to make :)

Ginger Pear Margarita

Here is drink number three! Just in time for you to make it before Summer is over! This drink is nothing crazy...we just decided to go ahead and make a margarita with the ginger/pear infused tequila we made. Here are the measurements we used: 1.5 shots ginger/pear tequila, half shot of triple sec, and the juice of 1.5 limes. Rim your glass with salt and enjoy!
I hope your September is starting off well! I'm not quite ready to accept that Summer is winding to an end...the last couple of days we have had typical rainy Portland weather, which was a bit of a shock after an unusually dry Summer. This week is supposed to be sunny again so we're hoping to squeeze in one last trip to the beach (and maybe a few margaritas and g+ts ;)! What're your plans?

Strawberries + Spice

Here is the second drink we made using our infused alcohols! For this one we mixed the jalapeño rosemary tequila with strawberries to make a sweet and spicy drink. You could also use the jalapeño vodka in this if you want something with slightly simpler tastes (or even a plain or fruit infused tequila if you're not down for spicy).
Start by taking 5-7 medium sized strawberries and heating them in the microwave until they are soft. Muddle the strawberries until they are a puree. If you don't want your drink to have chunks, put the strawberries to make a sauce (similar to the one I used here). Mix the strawberries with 1.5 shots of the infused tequila, a couple shots of club soda, 1.5 shots simple syrup, and the juice of half a lime. If need be, do a little tweaking at the end-- depending on the strength of your infused alcohol, you may need to use slightly different measurements...if the rosemary flavor is on the stronger side, try adding more simple syrup and lime. I love the hint of spice in this drink. Do you like spicy drinks? One of my all time favorite drinks is a mango habañero martini--that's next on the list to experiment with!

Cucumber Basil Breeze

This is the first of five cocktails we created using the alcohols we infused, and I think it is also our favorite! This drink is so light and refreshing -- perfect for a hot summer day.

For this drink you will need cucumber infused vodka, fresh basil, lemonade, lime and club soda. To start, put 1.5 shots of your vodka and 8-10 leaves of basil into a glass/shaker.  Muddle the basil well using a muddler or spoon. Add in 2 shots of lemonade and shake with ice. Add 1-2 shots of club soda and the juice of a wedge of lime. That's it!

Last night we used the cucumber vodka, but didn't have the ingredients to make this drink so we mixed the vodka with tonic and lime juice instead. So yummy!


Adventures in Infusing Alcohol

A couple of weeks ago my friend, Caroline, and I decided to give infusing alcohols a try. This has been the summer of cocktails -- all of our friends are finally 21 and we've been enjoying experimenting with different ingredients in mixed drinks. We decided to make 5 different infused alcohols using both vodka and tequila and were super happy with the results.  Over the next couple of weeks we will be sharing 5 different yummy cocktails we came up with using these!  See below for the details of each infused alcohol!
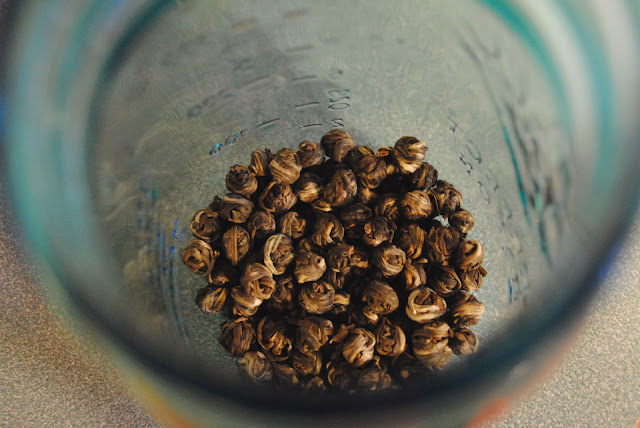
1) First, we made a small batch of jasmine tea infused vodka.  We just threw in a couple tablespoons of the dry tea (see above) with the vodka.  We left it in for 3 days but this made it wayy too strong...because it's tea...duh (honestly we kind of forgot about it...).  It worked out ok because we can just dilute it with plain vodka. We mixed about a third of a shot of this with 2/3 of a shot of plain vodka to get a good strength. If you just leave it in for 24 hours it should be fine to use on it's own.
2) One of the riskier concoctions we threw together was jalapeños and rosemary in tequila...In the end this one ended up being one of our favorites, even though it took a bit longer to perfect a cocktail using it since the flavors are a little different. First, we put around 5 or six sprigs of rosemary in with a little tequila and muddled it.  Then we added in a couple chopped up jalapeños and the rest of the tequila. Definitely take the jalapeños out after 24 hours or it will get too spicy.  We left the rosemary in for 3 days which may have been a little too long--it is a pretty prominent flavor.  I would suggest taking it out after 2 days, but if you want it to be a very subtle flavor you could take it out on the first day with the jalapeños.

3) We also made some vodka with just jalapeños.  Just throw in a couple of chopped up peppers and leave them in for a day.
4) One of our favorites was cucumber vodka -- so refreshing and summery (quick, go make it before summer is over!).  We just threw a chopped up cucumber into some vodka and let it sit for 3 days.

5) Last but not least was ginger pear tequila. We cut up a pear and a couple of inches of fresh ginger and let them sit in the tequila for 3 days.  The flavors weren't super distinct so I would suggest muddling the chopped up ginger in a little bit of tequila to get the juices out before you add in everything else.

Stay tuned over the next couple of weeks for some yummy drink recipes using these!

Butter Chicken + Roti

Who doesn't like butter chicken? I'm pretty sure no one is raising their hand right now.  Even when I was vegetarian I would sneak spoonfuls of sauce from my brother when he got butter chicken (I was an undisciplined vegetarian...).  This past weekend a friend came over and taught my roommates and I how to make butter chicken and roti.  We were in heaven. It was so good I even forgot to take a pretty picture of the final product on my plate.  Oops.  
Our friend taught us how to make everything based off of watching his mom throw ingredients into a pan ...so the measurements are approximate. Taste as you go to decide if you need to add more of anything!

Roti
2 cups whole wheat flour
4 tsp olive oil
A dash of salt
3/4 cup water (might have to add more)

Combine all of your ingredients, using your hands to mix.  Mix as little as possible. Slowly add more water until all of the dough can be shaped into one big ball--but don't let it get too sticky! Cover and let sit for 30-45 minutes. Sprinkle a clean surface with white flour. Separate your dough into small balls (like, golf ball size-ish). Roll the balls of dough out with a rolling pin so they are super thin.  About as thin as you can get them. Heat a pan and coat with butter. Cook until the roti starts to bubble and brown and flip.  Make sure to coat each side of the roti with a little butter while it cooks. Mmmmm. Put the roti on a plate with paper towels. Put your stack of yummy, buttery bread in the oven on low to keep warm while you finish up your curry!
Butter Chicken
Olive oil
1 Yellow Onion (chopped up small)
6 cloves of garlic (minced)
1 tablespoon butter
Roughly 2 inches of fresh ginger (grated)
1 tsp cumin
2 tsp coriander
2 tsp tandoori masala
1/2 tsp tumeric
1/4 tsp cayenne (this batch wasn't super spicy, so if you like your food spicy I would add a little more--add slowly at the end so you can make sure it doesn't get too hot!)
1 can of diced tomatos
A little over a pound of chicken breasts (cut up into bite sized chunks)
A few large spoonfuls of plain greek yoghurt (you could also use cream instead)
Salt to taste

Coat the bottom of a large pan with olive oil. Add in your minced garlic and cook on medium heat until slightly browned.  Add onions and heat until slightly browned. Add in butter, ginger, and all of your spices and cook for a couple minutes.  Next, add your diced tomatoes and let what you have so far sit on medium heat.  When the oil starts to separate from everything else it is time to add in the chicken. Make sure the chicken cooks all the way through! You can also add in your yoghurt at this point. Once everything is in, cover your curry and let it sit on medium/low heat until the sauce is thickened...or really as long as you want.  Our friend said the longer you let it sit, the better it gets. Ours probably sat for around an hour, with us checking on it every so often.

Serve your curry over rice with your roti! We also made some raita to have on the side (this is good to cool your mouth down if things get too spicy for you).  We made a quick version by mixing a small bowl of plain yoghurt with some chopped onions, garlic, cilantro and cucumber. Maybe add in a little cumin and coriander for some extra flavor.

Next time I want to try making this with paneer (indian cheese) instead of chicken--this would be a great substitution for any veggies out there. Hope you all enjoy this recipe!